Overview
The Seating Planner lets you design a visual layout of your classroom and assign students to specific desks. Once seats are assigned, you can view the plan in Projector Safe mode — which hides sensitive pupil data by default — making it safe to display on a classroom screen. You can also export the plan as a PDF.
Getting There
Click Classroom in the left-hand navigation.
Select Seating Planner from the classroom menu tiles.
The Design Room Layout page opens, prompting you to choose a room and a class.
URL | #/seating-planner/design-room-layout |
Access | School Admin, Teachers |
Choosing a Room and Class
Before you can design or view a seating plan, you must select the room and class you want to work with.
Click the Select room field and choose a room from the list (e.g. I1, I2, J1, Headteacher's Office).
Click the Select class field and choose a class from the list.
The room canvas loads, showing any existing desk layout for that room.
? If no desk layout has been set up for the room yet, a Set up seating dialog appears automatically — see the next section.
Setting Up a Desk Layout
If this is the first time you are using a room, you will be prompted to set up how many desks to place and what type they are.
Using a Quick Layout
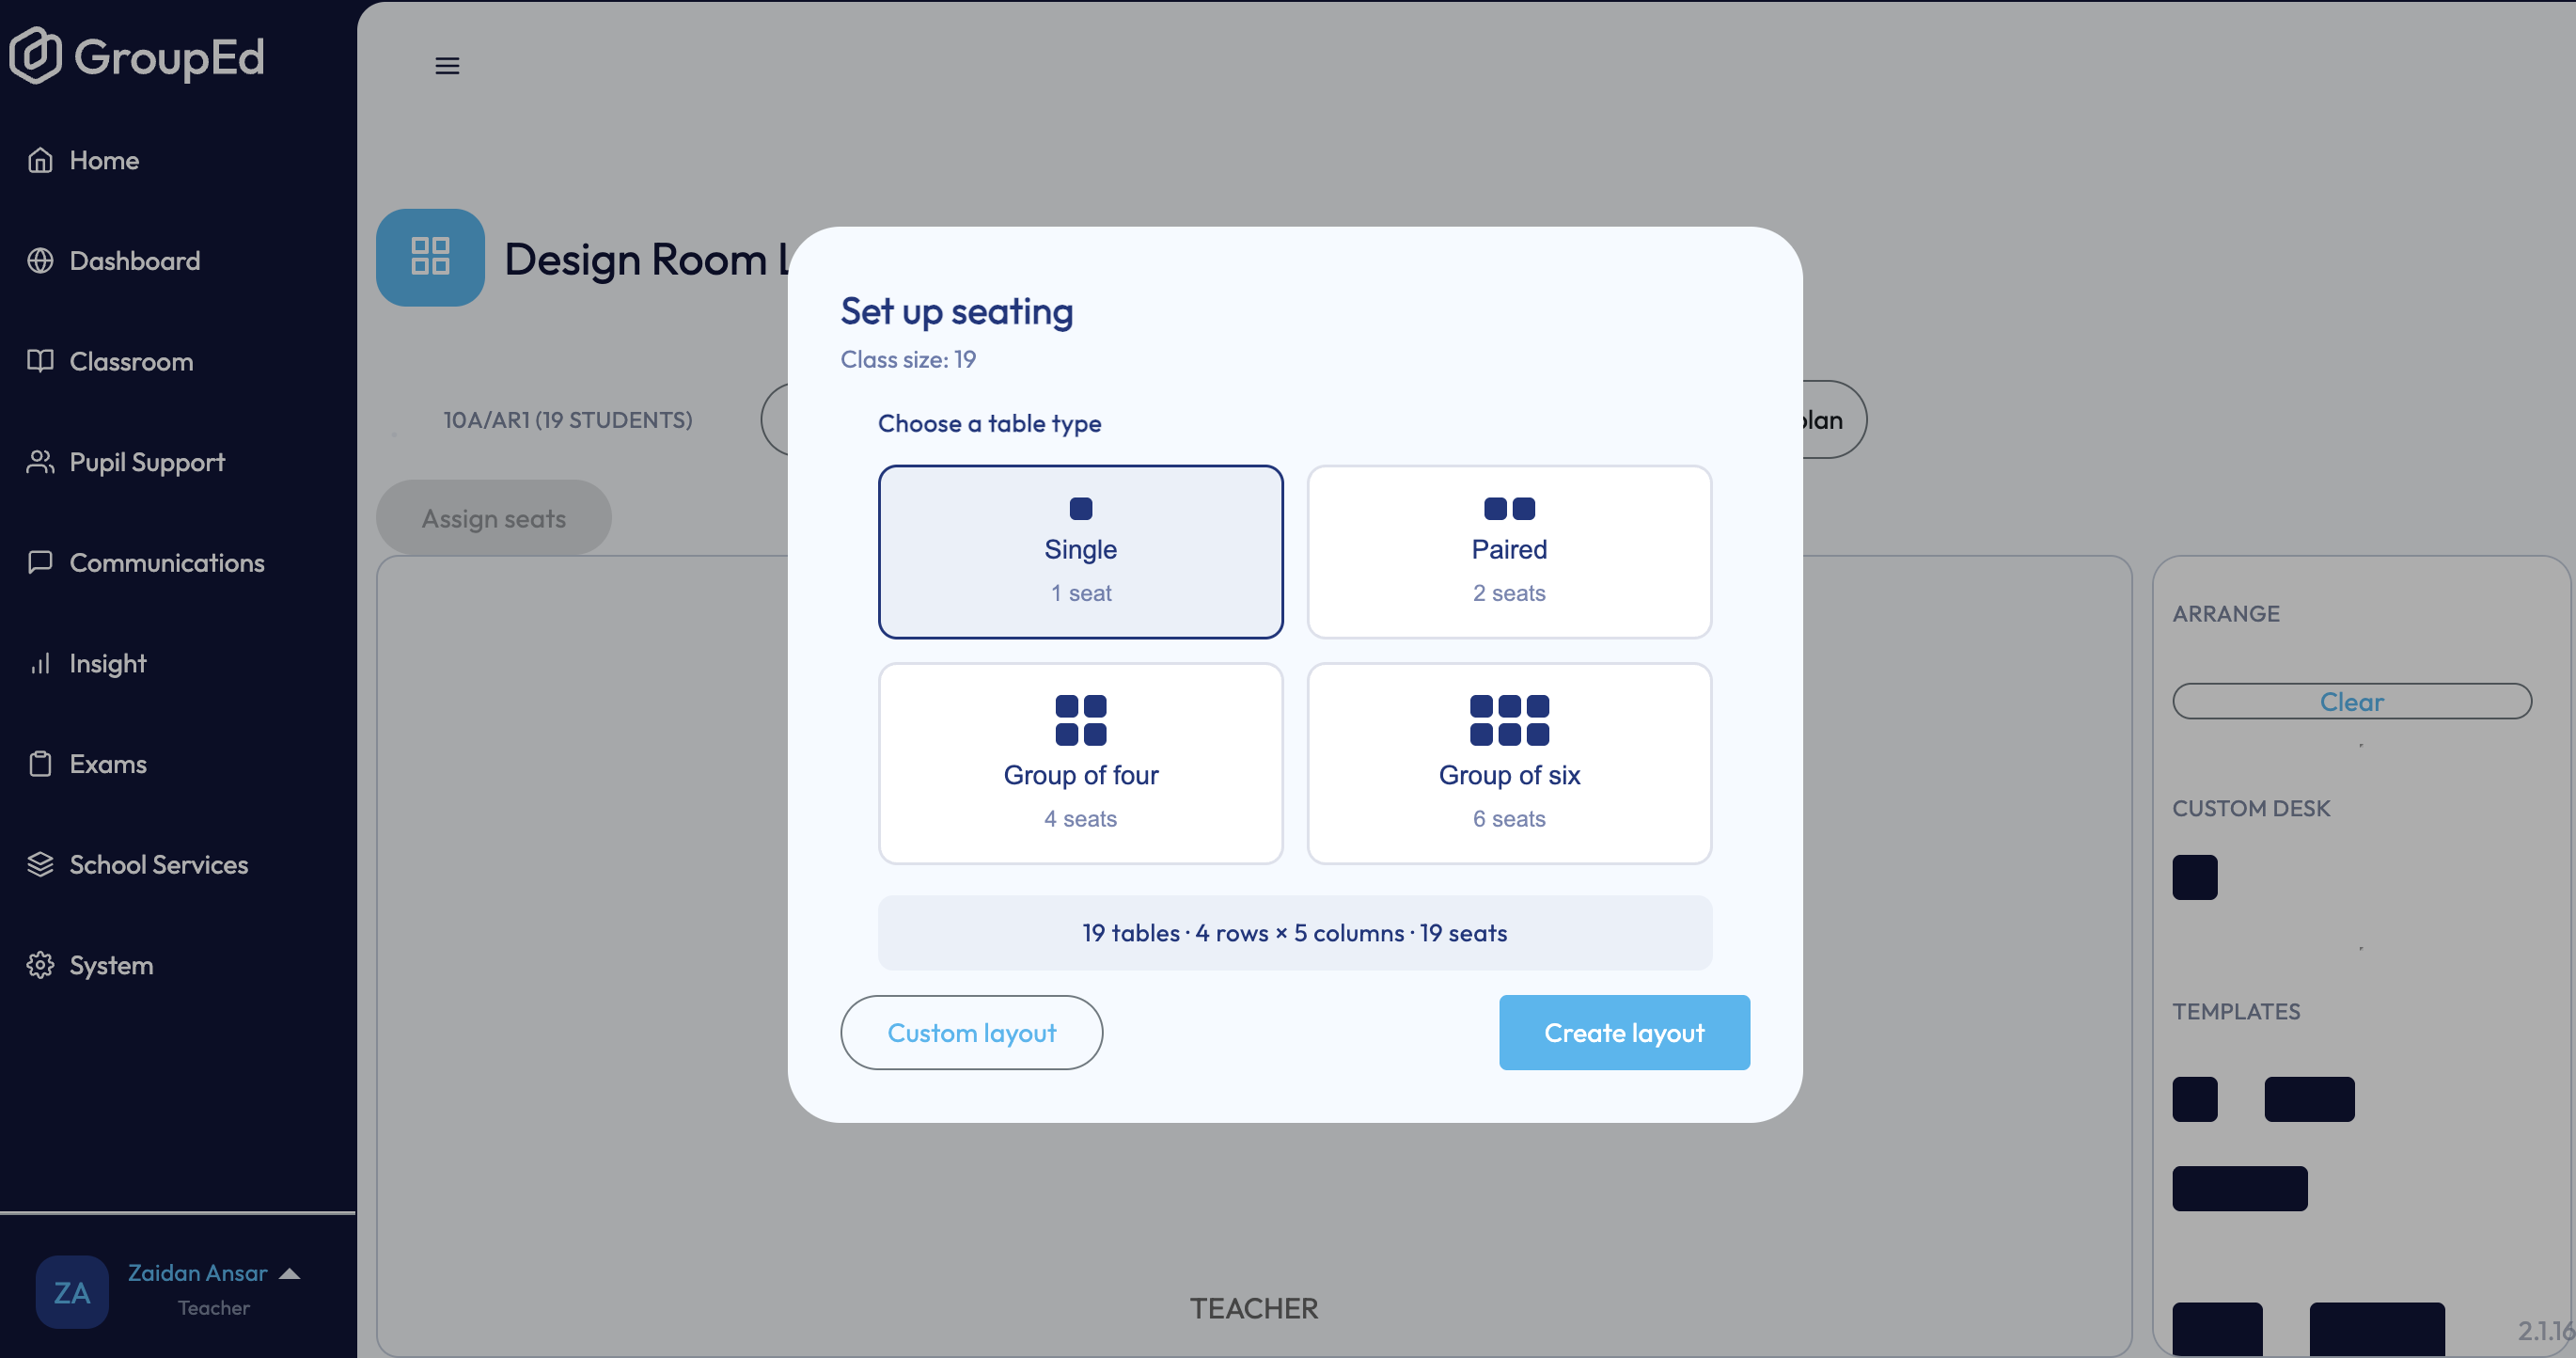
In the Set up seating dialog, choose a table type:
Table type | Seats per table |
Single | 1 seat — individual desks arranged in a grid. |
Paired | 2 seats — desks placed side by side in pairs. |
Group of four | 4 seats — small group tables. |
Group of six | 6 seats — larger group tables. |
The dialog shows a preview of the total number of tables, rows, and columns based on the class size.
Click Create layout to add the desks to the room canvas.
Using a Custom Layout
In the Set up seating dialog, click Custom layout.
The canvas opens with an empty room. Use the right-hand panel to build your layout manually:
Panel section | What it does |
ARRANGE — Rows / Columns | Set the number of rows and columns in the grid using the + and − buttons. Click Clear to remove all desks. |
CUSTOM DESK | Drag the single desk tile onto the canvas to add individual desks anywhere in the room. |
TEMPLATES | Drag pre-built desk cluster shapes (single, paired, rectangular) onto the canvas. |
Arrange the desks to match your real classroom layout.
Click Save room layout to save the desk positions.
The Two Views
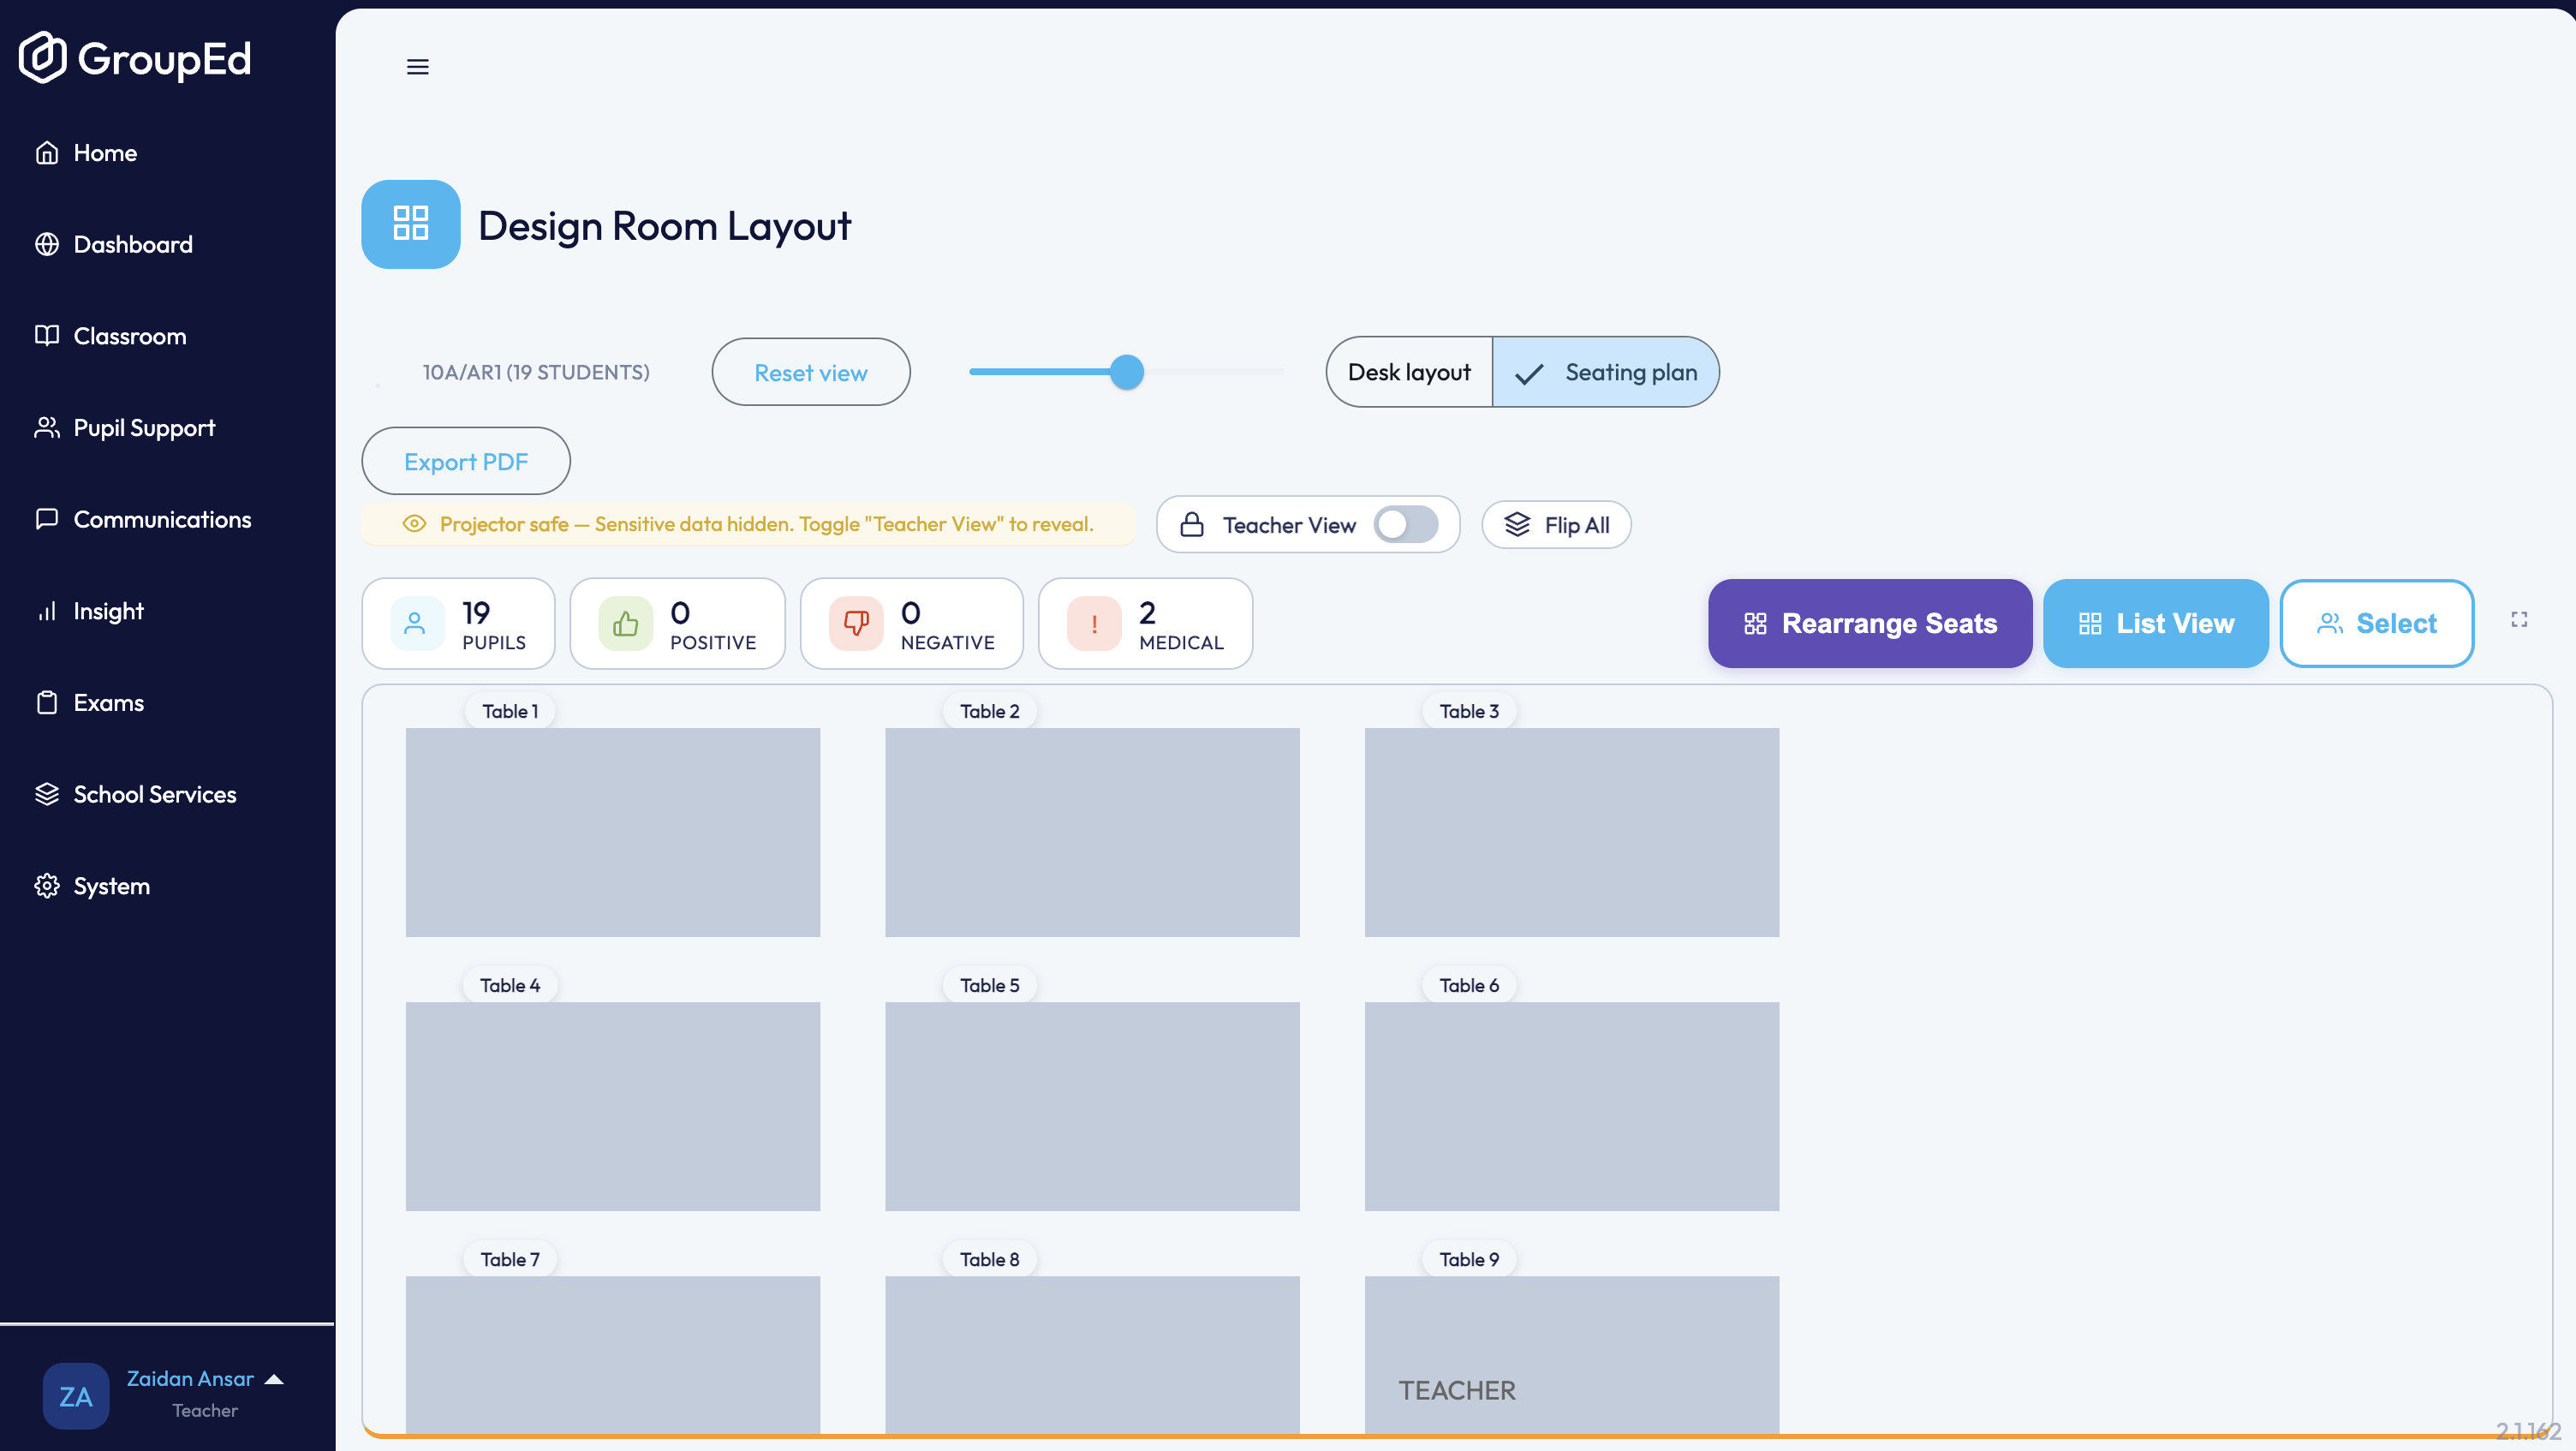
Once a room and class are loaded, you can switch between two views using the toggle at the top of the page.
View | Purpose |
Desk layout | Design and edit the physical desk positions. Drag desks around the canvas, add or remove desks, and adjust rows and columns using the right-hand panel. |
Seating plan | Assign students to desks and view pupil data overlaid on the plan. Use this view during lessons or for display on a projector. |
Seating Plan View
The Seating plan view is where you assign students to desks and see live data about your class.
Pupil Summary Bar
Across the top of the canvas, a summary bar shows key information about the class at a glance:
Indicator | What it shows |
Pupils | Total number of students in the class. |
Positive | Number of positive behaviour points recorded. |
Negative | Number of negative behaviour points recorded. |
Medical | Number of students with a medical note. |
FSM | Number of students eligible for Free School Meals. |
ALN | Number of students with Additional Learning Needs. |
LAC | Number of students who are Looked After Children. |
EAL | Number of students with English as an Additional Language. |
By default the seating plan is in Projector Safe mode — sensitive labels (FSM, ALN, LAC, EAL) are hidden so the plan is safe to show on a classroom screen. Toggle Teacher View to reveal this data for yourself.
Projector Safe Mode and Teacher View
A yellow notice at the top reads: Projector safe — Sensitive data hidden. Toggle "Teacher View" to reveal.
The Teacher View toggle is off by default. Switch it on to see the full pupil indicators (FSM, ALN, LAC, EAL) overlaid on each desk.
Switch Teacher View back off before displaying the plan on a projector or shared screen.
Action Buttons
Button | What it does |
Rearrange Seats | Opens the seat assignment panel so you can drag students to different desks or reassign them. |
List View | Switches from the visual canvas to a list of all students and their assigned seats. |
Select | Lets you select individual students on the canvas to view their details or move them. |
Export PDF | Downloads the current seating plan as a PDF you can print or save. |
Save room layout | Saves any changes made to the desk positions or seating assignments. |
Fullscreen | Expands the canvas to fill the screen — ideal for display on a classroom projector. |
Assigning Students to Seats
Switch to the Seating plan view.
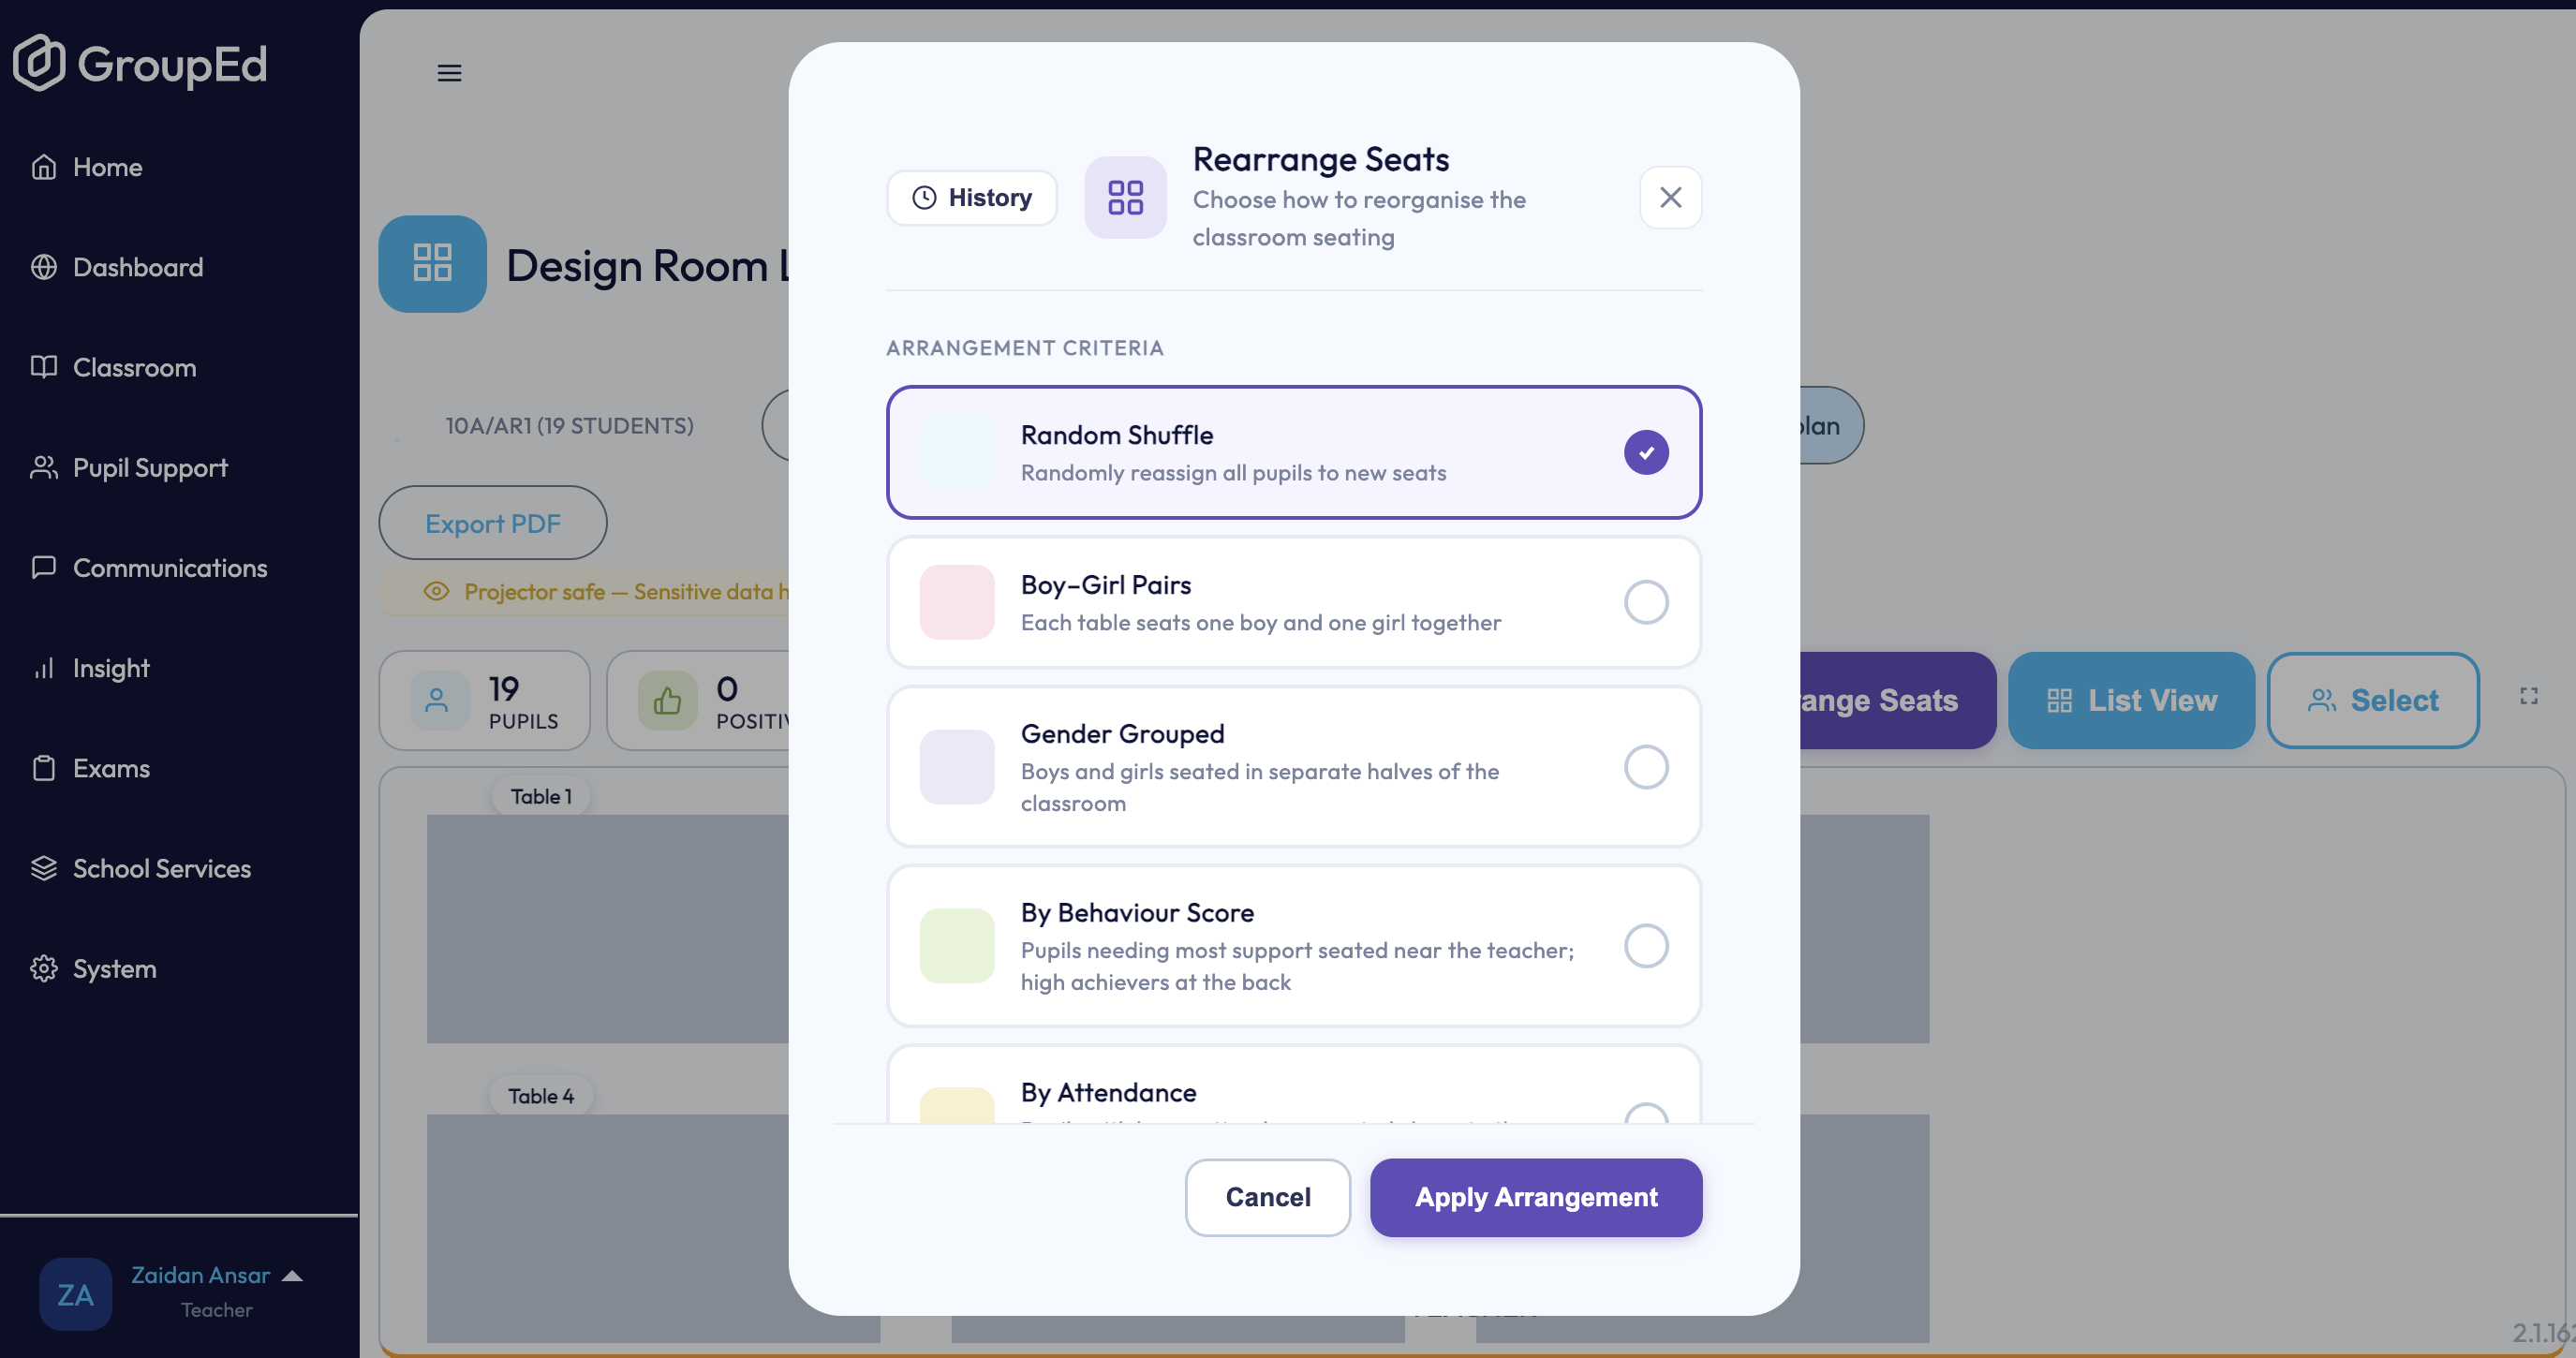
Click Rearrange Seats. A dialog opens offering six automatic seating arrangements: Random Shuffle, Boy–Girl Pairs, Gender Grouped, By Behaviour Score, By Attendance, and Spread Support Needs.
Select the arrangement you want. Each option explains how pupils are placed — e.g. By Behaviour Score seats pupils needing the most support near the teacher and high achievers at the back, while Spread Support Needs distributes ALN, FSM, LAC and EAL pupils evenly across all tables.
Click Apply Arrangement. Pupils are seated according to the rule you chose (or Cancel to close without changing seats). You can then drag any pupil to a different desk to fine-tune.
Click Save room layout to save the seating.
The picks counter next to each student's name shows how many times they have been selected for a particular seat — useful for tracking patterns when using random seating.
Exporting the Seating Plan as a PDF
Switch to the Seating plan view.
Click Export PDF at the top left.
The plan downloads as a PDF showing the desk layout, student names, and class information.
Tips
Set up the Desk layout once for each room, then just change the Seating plan assignment when you want to re-seat the class.
Use Projector Safe mode whenever students or visitors can see the screen — it hides FSM, ALN, LAC, and EAL labels automatically.
The Randomise button is a quick way to create a fresh seating arrangement at the start of term.
Export to PDF and print a copy to keep at your desk as a quick reference during registration or activities.
Was this article helpful?
That’s Great!
Thank you for your feedback
Sorry! We couldn't be helpful
Thank you for your feedback
Feedback sent
We appreciate your effort and will try to fix the article